
As I have said in previous posts, these freeze pop holders are perfect to keep little hands comfortable. My kids used to complain about how cold it was holding onto the pops, and this is the perfect solution. I can't wait for the COVID to pass, so my kids can start having their friends over. I have good size stash for everyone to be able to use them.
4mm hook for all pieces4ply yarn in the needed color
crochet needle for sewing in pieces
BASKETBALL

Ok, so this one really isn't much of a pattern, but sometimes, just seeing the item is a pattern enough. I sewed onto the basic pattern by using a yarn needle to do a slip stitch embroider. This is a really good video to show the technique. I use it for all my names and embroidering needs!

Start with gray (leave a tail for sewing)
WOLF/DONKEY
TAIL
 |
Start with gray (leave a tail for sewing)
Row 1: ch 2, sc 1
Row 2: turn, ch 1, 2sc in st
Row 3: turn, ch1, sc in each st (2)
Row 4: turn, ch1, sc in each st (2)
Change to white
Row 5: turn, ch 1, sc in each st (2)
Row 6: turn, ch 1, 2sc in each st (4)
Row 7: turn, ch 1, sc in each st (4)
Row 8: turn, ch 1, sc dec 2 times (2)
tie off and weave in ends.
Row 2: turn, ch 1, sc in the one stitch (1)
Row 3: turn, ch 1, 2sc in the one stitch (2)
Row 4: turn, ch 1, sc in 1st st, 2 sc in next (3)
Row 5: turn, ch 1, sc in each stitch (3)
leave a long tail to sew on.
With white:
With a yarn needle, sew on the white spot onto the ears.
With white
Round 1: Sc 2, 8hdc in 1st stitch, sl st to the first hdc to close off. Leave a tail to sew on.
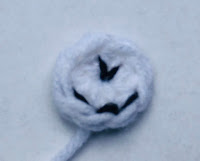
With black piece and needle, sew on the mouth and nose to the white circle.
Sew all the pieces onto the main holder, and sew onto the eyes as you did the mouth and nose.


Row 4: turn, ch1, sc in each st (2)
Change to white
Row 5: turn, ch 1, sc in each st (2)
Row 6: turn, ch 1, 2sc in each st (4)
Row 7: turn, ch 1, sc in each st (4)
Row 8: turn, ch 1, sc dec 2 times (2)
tie off and weave in ends.
EARS (make two)
Row 1: ch 2, sc in 1st stitchRow 2: turn, ch 1, sc in the one stitch (1)
Row 3: turn, ch 1, 2sc in the one stitch (2)
Row 4: turn, ch 1, sc in 1st st, 2 sc in next (3)
Row 5: turn, ch 1, sc in each stitch (3)
leave a long tail to sew on.
With white:
With a yarn needle, sew on the white spot onto the ears.
NOSE/MOUTH
Round 1: Sc 2, 8hdc in 1st stitch, sl st to the first hdc to close off. Leave a tail to sew on.
With black piece and needle, sew on the mouth and nose to the white circle.
Sew all the pieces onto the main holder, and sew onto the eyes as you did the mouth and nose.
Comments
Post a Comment